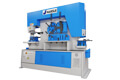
Punching
Pre-Operation
●Read and understand the instruction manual before operating the Ironworker.
●Check the punch securing nut, die, stripper and die at the start of each shift and periodically throughout the day for tightness.
●Check the punch and die for alignment prior to punching the first hole and intermittently during the day.
●Do not punch anything thicker than one punch diameter. Remember that the higher the grade of steel, the more punch power is required.
●Punch full and complete holes, do not punch partial holes. The side thrust encountered in punching a partial hole can force the punch against the die and result in punch or die breakage.
●Contact both sides of the punch stripper. Punch holes with sufficient material around the hole so that contact will be made on both sides of the punch stripper. Stripping forces can be severe. Unbalanced forces due to contact on only one side of the stripper may cause punch breakage.
●Prior to operating the Ironworker, remove all tools or other objects from under the beam and punch ram. Failure to do so could result in danger to other personnel and to tools.
●Stay within rated punching capacities. The ironworker is designed to punch or shear in mild steel. Within conservative limits it can also be used to punch or shear in medium carbon-annealed steel and some grades of abrasion resistant steels.

Operation
●Turn on motor switch.
●Swing lever to P (Punch) setting. The punch will move to the raised position. The punch-operating pedal will be in the raised position and the shear-operating pedal will be in the down position.
●Move valve knobs when machine is at rest at either end of the stroke.
●Place valves in position:
No.1-pulled out
No.2-pulled out
No.3-pushed in
These valve positions give maximum speed and 70 % of the power.
●Place the material to be punched beneath the punch.
●Check that the area below the foot pedal is clear.
●Move hands away from the punch area. There is no need to hold the material being punched.
●Depress foot pedal.
●At the conclusion of the stroke, the foot should be removed from the pedal and the machine will return and stop in readiness for the net stroke.
Shearing
Pre-Operation
●Read and understand the operational manual prior to use.
●Wear safety glasses.
●Shear only mild steel. The machine is designed to handle SAE-1020 steel. This is a grade of steel, not a thickness.
●Keep the shear section clear.
●Remove all tools from under the upper arm when switching from shear to punch mode.
Operation
●Turn on motor switch.
●Swing lever to S (Shear). The machine will now have moved to a position with the shear in the raised position. The operating pedals will have changed position with the shear pedal in the raised position and the punch pedal in the lowered position.
●Move the valve knobs when the machine is at rest at either end of the stroke.
●Place the valve knobs in the proper position.
Standard Shear Position:
No.1 - Pushed in
No.2 - Pushed in
No.3 - Pulled out
Maximum Shear Position
No.1 - Pulled out
No.2 - Pushed in
No.3 - Pulled out
●Place the material to be cut between the shear blades.
●Snug the moveable blades up to the channel's flange.
●Check that the area below the foot pedal is clear.
●Move hands away from shear blade. Unless the material is very long there is no need to have the hands on the material to be sheared.
●Make the shear stroke by depressing the foot pedal.
●Before releasing the foot pedal back the moveable blades off by ½ turn of the crank. Make sure the slug drops from the chute after each stroke.
●At the conclusion of the stroke, remove the foot from the pedal and the machine will return and stop in readiness for the next stroke.

 English
 Pусский